Friday, 17 June 2011

Composting - The basics

One of the best things you can do as an organic gardener is to make compost. Compost is simply recycled organic waste. We have tried a few different composting techniques on site and have learnt alot about making your own compost. Compost can be made by simply adding organic material to a heap but it may take a long time and if the mix is unbalanced, the end product may not be very pleasant.
We built a large heap of garden waste and just let it sit. This heap consisted of mainly weeds, branches, grass cuttings and hedge clippings with some soil and organic fabrics. This system of composting is called Cool Heap Composting and usually takes a very long time to compost. We built our heap in 2009, and have just collected our first usable compost. 
 Cool compost heap

Once we removed the majority of un-decomposed larger material we were left with about ten inches of compost, enough to fill two wheel borrows. It was lovely compost, very rich in organic matter, dark in colour, crumbly and sweet smelling. The larger organic material which were not able to be fully decomposed would be shredded and added to another composting system. 

  Ready to use home-made sieved compost

Another method of composting we have tried is the hot bed/heap composting system. This involved digging out a hole in the ground and filling it with lots of alternating layers of brown material and green material (explained later). We first added a small layer of wood/paper ash and then added all the organic material. We made an effort to chop up all the material to allow the micro-organisms, which would be doing the composting, more surface areas to work on. For this we used a simple garden spade. 
Layering and chopping the material

For the hot bed method we added a layer of fresh horse manure (high in both brown and green material) and a bit of Netfrey tea fertilizer, just to help get things moving along.
  Home-made fertilizer (not much needed)

The finished bed was then covered and would not be disturbed for at least one (1) month, at which time the heap will be turned/mixed and then left to mature. This system would normally take anywhere from six (6) months up to a year, and the results are always amazing.  
The completed heap

It is important to note that if you are going to be using this method of composting that there is a hole in the ground and it could be very dangerous, especially at night, therefore it is advisable to cover the heap with a hard surface, we used a strong wooden pallet which also makes a very good work surface, and helps reduse the amount of rain getting into the heap.
  Willow cuttings on hot compost bed

This system can also be done using a conventional compost bin. So instead of using a dug out hole, you would build up the layers in a compost bin and let mature for a few months. If the hot composting system is used in a bin it can take less time till the compost is ready for use, if managed properly. We have collected some compost from the last hot bed we made in late October and it was very good compost. 
Eight (8) months of composting (turned twice)

Green & Brown
When it comes to composting it is important to get the mix of brown and green material right. Brown materials are those high in carbon:

  • Corn cobs and stalks.
  • Eggs shells.
  • Feathers.
  • Cardboard Cereal and egg boxes.
  • Corrugated cardboard packing.
  • Newspapers (not glossy magazines).
  • Toilet and kitchen roll tubes.
  • Tissues, paper towelling and napkins (make sure they are not contaminated with meat, fats, oils or disease).
  • Natural fibre string.
  • Shredded plain paper.
  • Young wood garden prunings.
  • Dry leaves, small twigs and most hedge cuttings.
  • Hay and Straw.
  • Ash from wood or paper fires.
  • Sawdust.
  • Pine needles and cones.
Too much of brown material would greatly slow down the composting process and will give you an end product very high in carbon and lacking other minerals, but too much green material will result in bad smelling soggy compost. Green materials are those high in nitrogen:

  • Vegetable peelings.
  • Salad waste.
  • Fruit waste i.e. apple cores, skins etc. - includes citrus fruit.
  • Used tea bags/leaves.
  • Used coffee grounds and filter paper.
  • Dead flowers and house plants.
  • Grass cuttings.
  • Old flowers.
  • Old bedding plants.
  • Nettle.
  • Rhubarb leaves.
  • Comfrey leaves.
  • Young annual weeds.
  • Pond weed.
  • Seaweed - watch out for oil contamination etc.
I would suggest getting a balanced heap of around 1:1 of green and brown material. 


It is important to protect your composting systems from the elements but it is also as equally important to keep it aerated. The flow of air helps keep the heaps from producing bad smells. You should also try to minimise the amount of larger bits of material added to your system. The compost makers (microbes, worms, bacteria, woodlice, etc.) will work better and faster when they have more surface area to work on. The smaller the bits of organic matter added to a composting system the more surface area is available to the compost workers. However some larger bits are required to help aid air flow through the heap. 
Our newly built compost bin.

I believe that you get the best result from composting when you fill up your composting system in one go and leave it to mature, turning once in a while. I believe that once the heap is built nothing else should be added to it and all other composting material should be stored in separate bins. At May Project Gardens we now have a large bin for the storing of brown material, smaller bins for collecting green material, a bin where the actual composting heap will be built, and we also have a small wormery which is very productive. Composting is a fantastic way of recycling organic waste and is not only useful to gardeners but fun too. Making your own compost saves you money and helps the environment and there is no better feel than producing your very own healthy organic soil from 'waste'.


Tuesday, 7 June 2011

Polytunnel News

Room with a view-Land Matters, South Devon
One month......That's how long I haven't posted anything on this blog. It's been a very busy couple of weeks, we have been  preparing for the London Green Fair and are now getting ready for the open square weekend taking place this coming weekend. Our sign is almost ready and we have been trying our hand at making elder flower juices and wines. For the pass week I have been staying at a self sustaining community in south Devon called Land Matters. I had an amazing time living off grid, bathing in the stream, fresh goats' milk every morning, and I learnt alot about community life. We spent a week down in Devon and are now back in busy London trying to get the May Project site ready for our open garden square visitors.
The polytunnel has  finally been repaired, well the tears have been covered up and this has really helped with the number of snails and slugs we have had. It is now fully planted up and looking amazing, it has been so dry the pass few weeks that we have had to be watering it almost everyday. Thanks heavens as I am writing this blog the rain is falling has been falling for almost 24 hours straight. Its a good thing too cause while I was away it only rained enough to just wet the surface of the ground so when I returned the plants were looking a bit droopy. We have planted some very thirsty plants inside the polytunnel and will have to keep a very close eye on them if the dry sunny days return. We have planted the usual heat loving plants inside the polytunnel this season. We have got an  entire bed devoted to sweet and hot peppers and so far they are all doing very well.
Hot and sweet peppers three (3) month old.

Last year we had only two large beds running down the sides in the polytunnel and got a good enough yield for the space used but this design left a large bit of unused space down the centre. So this season we put in two L-shaped beds running down the sides and a straight bed running down the centre. We are playing with the idea of using the vertical space we have inside the polytunnel, we may attempt hanging baskets or suspended grow beds using grow-bags. We have built bamboo trellises to try and train the squashes, gherkins and our last surviving melon to grow vertically.
 Gherkins(back), Butternut Squash(middle) and Melon(foreground).

Squash Festivals.

The two most famous plants planted under a polytunnel in London, I think, are tomatoes and aubergines and we have got them both in abundance. Last season we had a good crop of tomatoes but our aubergines did not do as well as expected. We were able to get two from three plants and so this season we have planted quite a bit more, with this and our improved soil we are hoping to get a better yield this time around.
 Two varieties of tomatoes.

Lots and lots of aubergines. 

Our lemon balm just keeps on coming. This is its second season and no matter how much we harvest off of it it keeps on coming back for more. Its a fantastic plant and gives the polytunnel a nice citrus aroma, very much appreciated especially after feeding the soil with our home-made 'Netfrey Tea' plant fertilizer.
Lemon Balm a few days after cutting

As always, there are seedlings coming up in the nursery. We have got chives, leeks, some sweet and hot peppers and we are trying to grow some hibiscus which have not yet taken. That's all that happening under the polytunnel so far and it all looks very promising. We should have a very very good harvest this year, fingers crossed.

Monday, 9 May 2011

Rain Dance

It's been a dry couple of weeks and it had started to show on the May Project Gardens site. Our rain water storage is only 400lts and that's enough to only water the entire site once. We need a bigger rain water storage tank. If we are able to collect and store more rain water we will greatly reduce the amount of tap water used in the garden during dryer periods. But it's not all bad news, it rained two days ago and there is a slightly different feel to the garden. It's a lot cooler for one and most of the insects which were hanging out in the garden the past few days have moved on. 
Although its' been dry there has been a lot of growth and all sections of the site have been putting on a show for spring. The kitchen garden space consisting of salad leaves and herbs is very lust and we have already started harvesting off of it, just this morning I had a nice cup of peppermint tea.
Kitchen Garden with salad leaves and herbs

The main crop space is also in full swing. The beans are doing better than they were last season and the black flies and aphids have not been that much of a problem yet. Our potatoes and garlic shares the same space and are also coming on very nicely.
 Beans, potatoes and garlics

The second main crop bed consists of carrots, onions, French beans, squashes, and sweet corns. We are attempting to train the squashes to climb up a home made trellis made of reused bamboo canes which were originally used as a screen.
 Second main crop bed

We timed the rain perfectly this week. The evening before the rain came we added the home-made fertilizer to the beds and the rain made sure it got soaked into the soil. The fertilizer is made on site and using only natural sustainable ingredients: 3 part comfrey, 1 part nettles, and enough water to just cover the comfrey and nettles. The technique we use is to press/crush the comfrey and nettle leaves and then add a bit more water and cover from rain, and  I like to add a few different natural stones just because they release minerals as they slowly dissolve, and these minerals are loved by plants, and they act as weight to keep the leaves submerged. In two to three weeks all the leaves would have almost vanish leaving a  have concentrated liquid plant feed.   
 The beginning stages: crushed leaves and water

We call it 'Nettfrey Tea'

We are also making compost. We have got hundreds of thousands of workers on the composting site, we compost with worms and other soil inhabiting creatures. Our worms are doing a great job this year, the soil they have been building is very rich and has very good texture. We also have a hot composting bin, this was filled up with alternating layers of green (nitrogen rich) materials and brown (carbon rich) materials and a splash of diluted Nettfrey Tea, covered and left for a few months, turning once or twice a month. This season we are adapting techniques used in the Quick Return compost making method developed by Ms. Maye E. Bruce in the 1950's, we hope to be composting more in the coming seasons using her techniques. 
 Yummy worm compost

Newly built compost heap

Other originally built compost bins have now been used as storage for material collected from the garden that were either too big or not ready to be used for composting. To be perfectly honest, it's turning into a bit of a tip, we will be investing in a shredder soon I suspect.
Storage piles

Our strawberries have filled out there bed these past few weeks and so has our little wild space behind the polytunnel.
Strawberries--------------------The wild bunch

Another wild space which has had a good couple of weeks is the pond area. All the plants which we added to the site are doing really well. We have seen newt-lets, tadpoles, boatman, snails, and other creatures hanging out in the pond and we have had loads of visits from a numerous amount of insects which in turn attracts the birds that do take the occasional swim.
Wildlife pond space
Elder overlooking the pond

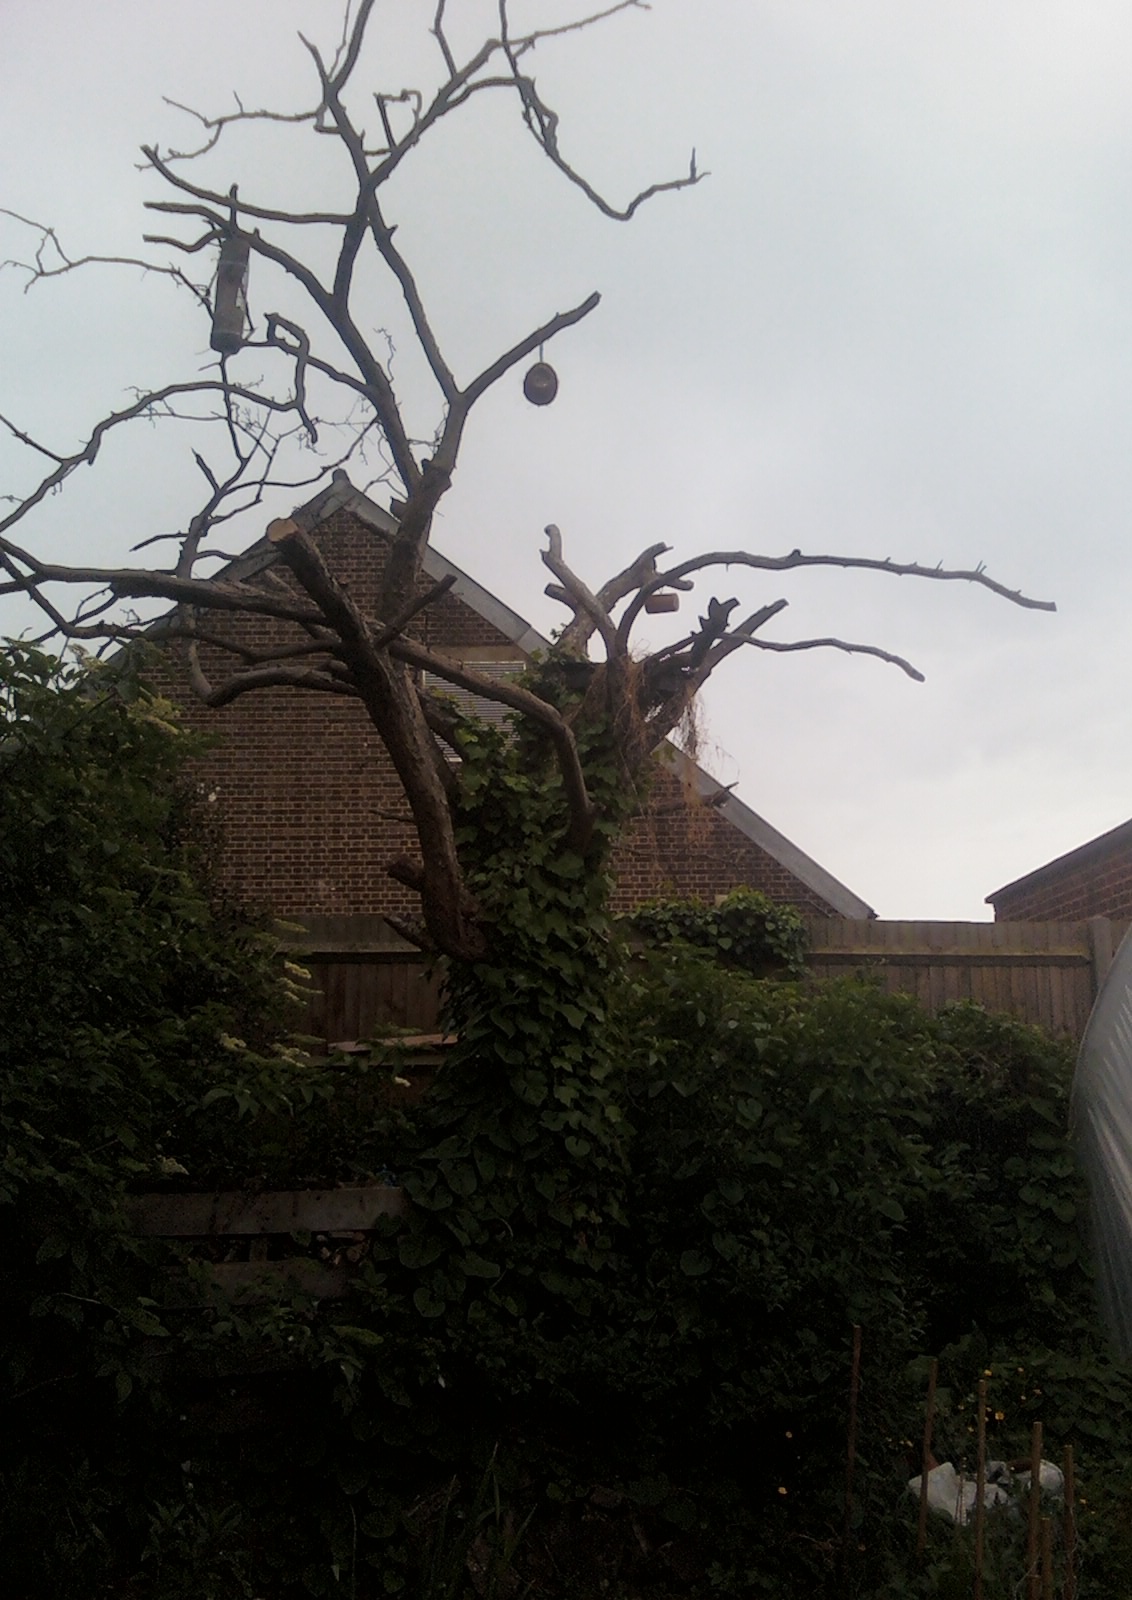
I must admit, the insects are not the only reason the birds visit our garden. We have turned one of our trees into a feeding station for their enjoyment and we have also added in a bird bath in the tree for those birds that don't like coming down to ground level.
   'Dead Tree'

We have started work on the front garden, we cleared a small spot and planted in some sunflowers. Last year we had 10ft tall red, yellow and pinkish-white sunflowers, fingers crossed we will beat our record this year.
Sunflowers out front

Remember the meadow I wrote about in the last post? It's actually taking shape very nicely. The grasses have shot up and quite alot of the flowers have started growing their first set of true leaves.
 Wild flower meadow

That's all for now but next time I will take you into the polytunnel and share with you how we make our elder flower champagne. Until then happy gardening.